CROWNSEAM®MATERIALS &
MAKING

COLOUR / TEXTURE / CHARACTER

Garment washes, dyeing & streetwear finishes

Compare garment dye, enzyme wash, acid wash, sun fade, spray effects, distressing and burnout. Learn what to specify and approve before production.

Crownseam editorial guide · Reviewed 15 October 2026

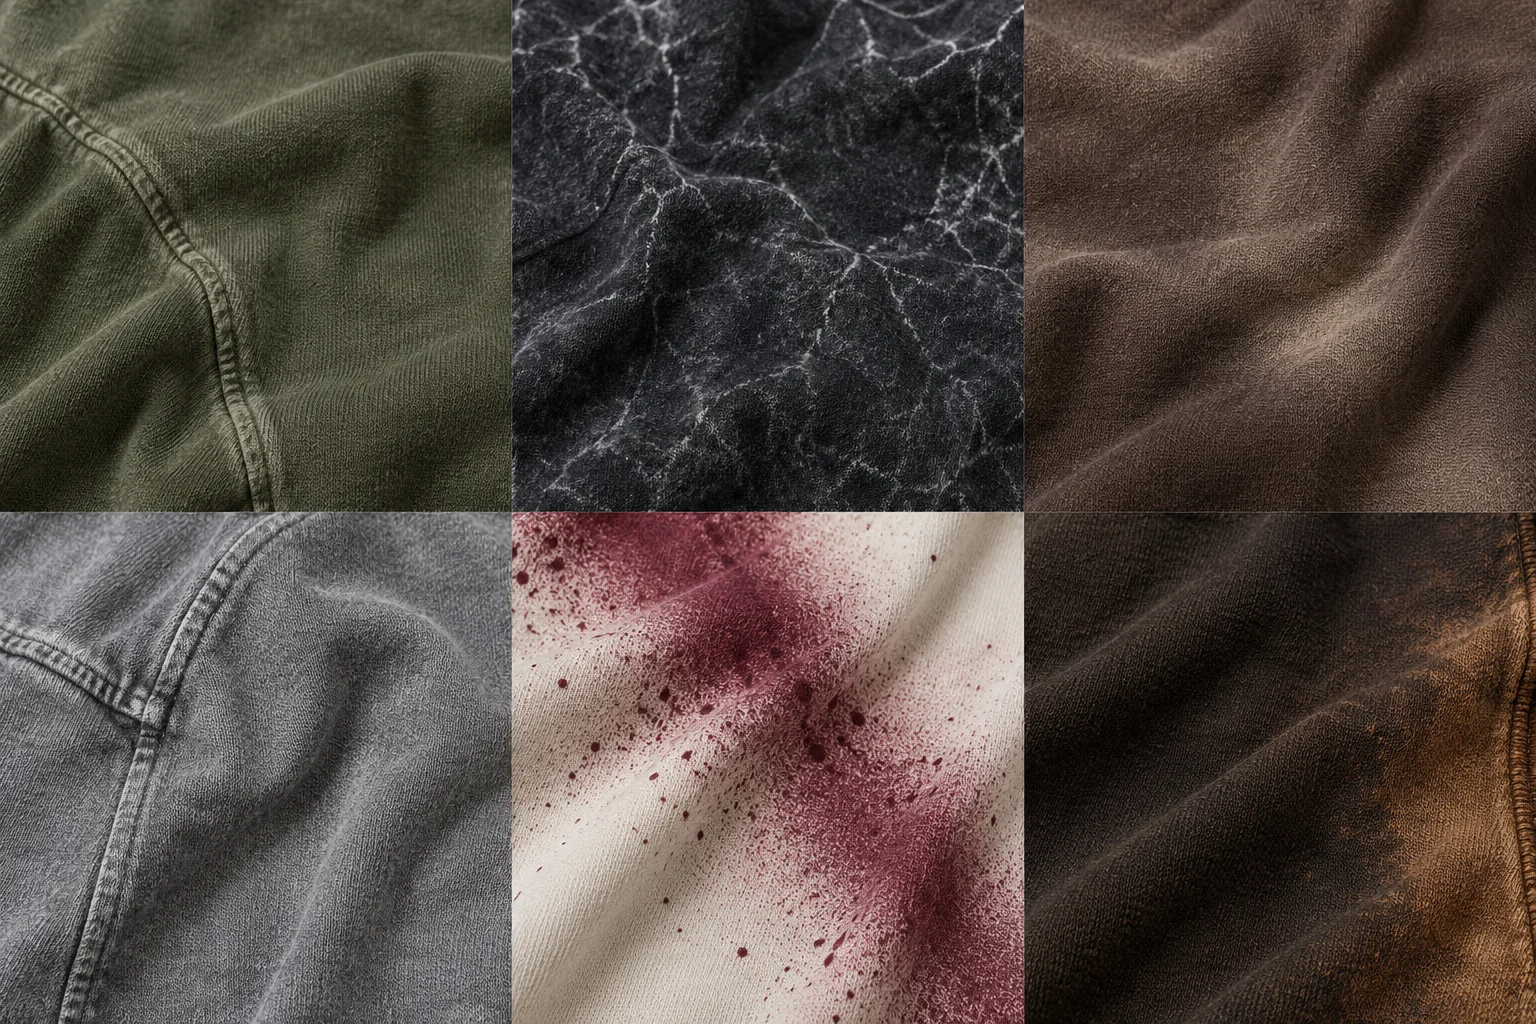
Illustrative textile and surface details for washes & finishes
AI-generated material study · approve actual fabric and decoration samples
In this guide

A washed black hoodie, a faded tee and a bleached denim jacket can have very different production routes. Start with the effect you want, then match the process to the actual fibre, fabric construction, colour and garment.

This guide separates dyeing, washing, colour removal, applied graphics and physical distressing. It is a planning reference: send a visual reference and let us confirm a suitable route for your garment through sampling.

COMPARE THE APPEARANCE

See what changes.

Pigment-dyed appearance
Acid / marble appearance
Sun-faded appearance
Stonewashed appearance
Spray / splatter appearance
Simulated scorch-look colour

AI-generated illustrations, not Crownseam production samples. Texture and relief are illustrative. A photograph cannot prove a process, reflectivity or performance; approve a physical sample of your exact combination.

THE TECHNIQUE LIBRARY

Choose the effect.
Understand the trade-offs.

Explore 19 techniques and options. Compare up to three, then include your shortlist in an email.

19 techniques shown

Wash / surface finishing

Enzyme wash

An enzyme treatment can alter exposed fibres and develop a softer, worn surface; the enzyme must suit the substrate.

Suitable starting point
Cotton-rich casualwear and appropriate denim constructions.
Why choose it
A route to controlled softness and surface character.
Design, limitations & sample checks

Limitations: Not a universal treatment for every fibre or trim.

Design it well: Describe the desired softness and fading separately.

Approve on the sample: Compare handle, dimensions and strength after finishing.

References: RUDOLF HUB1922 — Garment finishing product reference ↗

Ask about this technique ↗

Surface finishing

Biopolishing

Cellulase-based biopolishing reduces protruding surface fibres on suitable cellulosic fabrics.

Suitable starting point
Suitable cotton and other cellulosic jerseys and knits.
Why choose it
A cleaner-looking surface with less visible fuzz.
Design, limitations & sample checks

Limitations: Results depend on the selected fabric and process; it is not a blanket anti-pilling guarantee.

Design it well: Request a smooth face if small graphics must remain crisp.

Approve on the sample: Check the final surface, weight and hand against the untreated sample.

References: Novonesis — Cellusoft cotton biopolishing ↗

Ask about this technique ↗

Wash / abrasion

Stonewash / abrasion wash

Mechanical abrasion develops a worn appearance, traditionally using stones; alternative abrasive systems also exist.

Suitable starting point
Suitable denim and robust casualwear.
Why choose it
Highlights around raised construction details.
Design, limitations & sample checks

Limitations: Abrasion can affect fabric and trim integrity.

Design it well: Mark the strength of wear you want around seams and edges.

Approve on the sample: Check holes, seam damage, colour contrast and finished measurements.

References: RUDOLF — Dryway abrasion technology ↗

Ask about this technique ↗

Colour removal / appearance

Acid wash / marble effect

An irregular light-dark marbled effect. The familiar acid-wash name does not mean an acid bath is the defining process.

Suitable starting point
Suitable dyed casualwear after fabric trials.
Why choose it
Strong, irregular surface character.
Design, limitations & sample checks

Limitations: Different suppliers may use the label differently.

Design it well: Specify fine veins versus broad patches and desired contrast.

Approve on the sample: Approve randomness and the darkest/lightest acceptable areas.

References: CottonWorks — Garment finishing terminology and processes ↗

Ask about this technique ↗

Colour removal

Bleached / washed-down effect

A controlled industrial colour-reduction route, distinct from adding a pale print.

Suitable starting point
Suitable dyed bases selected for the process.
Why choose it
A lighter shade or highlighted areas.
Design, limitations & sample checks

Limitations: Fibre, dye and elastane compatibility require verification.

Design it well: Specify the desired final shade rather than a chemical recipe.

Approve on the sample: Check colour, strength, trims and decoration together.

References: RUDOLF HUB1922 — Garment finishing product reference ↗

Ask about this technique ↗

Appearance family

Mineral wash / snow wash

Commercial names for mottled, frosted or worn effects; they do not define a single standard construction.

Suitable starting point
Streetwear tees, hoodies and denim subject to trials.
Why choose it
A textured alternative to a uniform solid.
Design, limitations & sample checks

Limitations: A name alone cannot guarantee a match to your reference.

Design it well: Describe speckle size, pale coverage and the remaining dark base.

Approve on the sample: Compare several sample pieces for an agreed variation range.

References: CottonWorks — Garment finishing terminology and processes ↗

Ask about this technique ↗

Appearance family

Sun-faded / vintage fade

A deliberately aged colour effect, often focused on exposed areas, folds or edges.

Suitable starting point
Casual tees, sweats and other compatible streetwear.
Why choose it
Soft visual ageing that can support a vintage collection.
Design, limitations & sample checks

Limitations: The name does not establish whether actual sunlight, washing or another route was used.

Design it well: Mark a fade map; keep logos readable where intended.

Approve on the sample: Review front/back balance and the final underlying shade.

References: Jeanologia — Design and garment finishing examples ↗

Ask about this technique ↗

Production stage

Garment dye

The made-up garment is coloured after sewing, with the dye system selected for its fibres.

Suitable starting point
Garments designed for a compatible post-sewing dye route.
Why choose it
Coordinates the overall garment colour with its constructed appearance.
Design, limitations & sample checks

Limitations: Thread, rib and trims may take colour differently.

Design it well: Decide whether seam contrast is desired or unwanted.

Approve on the sample: Approve the complete garment, including inside trims and dimensions.

References: Archroma — Fibre-specific dyeing systems ↗

Ask about this technique ↗

Surface colour

Pigment coloration / pigment-dyed look

Pigment particles are held at the surface by a binder; pigment is not a fibre-reactive dye.

Suitable starting point
Suitable casualwear with a tested application system.
Why choose it
A useful route for surface colour and worn styling.
Design, limitations & sample checks

Limitations: The binder and application affect feel.

Design it well: Request the target base shade and softness as separate requirements.

Approve on the sample: Check hand, rubbing transfer, print compatibility and shade.

References: CottonWorks — Dyeing basics ↗

Ask about this technique ↗

Dye chemistry

Reactive dye

A suitable reactive dye can bond to cellulosic fibres. It can be used in different dyeing stages.

Suitable starting point
Appropriate cotton and cellulosic fabrics.
Why choose it
A route to a wide range of garment colours.
Design, limitations & sample checks

Limitations: Does not make polyester components behave like cotton.

Design it well: Provide colour references and identify any contrast components.

Approve on the sample: Approve shade and colourfastness on the actual blend.

References: CottonWorks — Dyeing basics ↗

Ask about this technique ↗

Dye placement

Tie-dye / resist dye

Resisted areas create patterns as colour reaches different parts of the fabric.

Suitable starting point
Compatible fabrics and dye systems, often cotton.
Why choose it
Organic pattern variation and expressive colour.
Design, limitations & sample checks

Limitations: Every garment will not reproduce a reference pixel for pixel.

Design it well: Specify palette, pattern scale and protected logo areas.

Approve on the sample: Approve placement tolerance on more than one garment.

References: Jacquard — Reactive dye placement applications ↗

Ask about this technique ↗

Dye placement

Dip dye / ombré

A placed transition between colours or from deeper to lighter colour.

Suitable starting point
Compatible tees, sweats and other tested bases.
Why choose it
A directional colour story with a softer transition.
Design, limitations & sample checks

Limitations: Transition height and smoothness need sample agreement.

Design it well: Mark the start, end and direction on front and back flats.

Approve on the sample: Check both sleeves and matching-set alignment.

References: Jacquard — Reactive dye placement applications ↗

Ask about this technique ↗

Additional coloration

Overdye / tint

A further colour application changes an existing shade rather than starting from a blank white base.

Suitable starting point
Suitable pre-coloured garments and fabrics.
Why choose it
Builds depth or changes the visual temperature of a shade.
Design, limitations & sample checks

Limitations: The original colour influences the result.

Design it well: Supply the starting colour as well as the target reference.

Approve on the sample: Check the effect on contrast panels, thread and labels.

References: Officina39 — Garment dyeing and finishing systems ↗

Ask about this technique ↗

Applied colour / graphic

Spray / airbrush effect

Colour is placed as a mist, gradient or stencil effect using a compatible textile system.

Suitable starting point
Suitable streetwear panels and finished garments.
Why choose it
Localized fades, soft edges and expressive accents.
Design, limitations & sample checks

Limitations: Spraying is an application method, not proof that the colour is a dye.

Design it well: Specify overspray limits and keep-clear areas.

Approve on the sample: Check edge softness, hand and finished-garment compatibility.

References: Jacquard — Textile paint application possibilities ↗

Ask about this technique ↗

Applied graphic

Splatter / paint effect

An irregular mark-making layout using textile-compatible colour or a printed interpretation.

Suitable starting point
Graphic tees, hoodies and other sampled streetwear.
Why choose it
Adds energy through controlled mark size and spacing.
Design, limitations & sample checks

Limitations: Random application needs a defined acceptable range.

Design it well: Mark maximum mark size, colours and logo exclusion zones.

Approve on the sample: Compare pattern density and the feel of painted areas.

References: Jacquard — Textile paint application possibilities ↗

Ask about this technique ↗

Mechanical / construction

Distressing / raw-edge effects

Intentional wear, breaks or edge treatment rather than colour change alone.

Suitable starting point
Appropriate casualwear and robust constructions.
Why choose it
Adds visible texture and a worn silhouette.
Design, limitations & sample checks

Limitations: Holes and loose edges can grow or change during use.

Design it well: Map each distressed zone and any reinforcement.

Approve on the sample: Check comfort, seam security and the approved care route.

References: Jeanologia — Denim finishing and vintage detail report ↗

Ask about this technique ↗

Surface abrasion / laser

Sanding / laser-aged details

Controlled surface wear or laser marking can place highlights, whiskers and local details.

Suitable starting point
Compatible fabrics, particularly denim; confirm other bases.
Why choose it
More defined placement than a random all-over effect.
Design, limitations & sample checks

Limitations: The actual material must be tested; a digital artwork is not a production approval.

Design it well: Provide the wear map at the intended garment scale.

Approve on the sample: Inspect detail edges, strength and marks close to seams.

References: Jeanologia — Localized laser details ↗

Ask about this technique ↗

Visual effect

Burn-look / scorched-look graphics

A darkened or torn-looking design can be simulated through a printed graphic, controlled colour effect or an approved distressed construction.

Suitable starting point
Fashion-led streetwear after design and material review.
Why choose it
Creates the visual theme without specifying open-flame treatment.
Design, limitations & sample checks

Limitations: The reference must distinguish colour marks from actual holes.

Design it well: Send a close-up and label which areas are visual only.

Approve on the sample: Approve edge feel, actual openings and the finished appearance.

References: Jacquard — Textile paint application possibilities ↗Jeanologia — Localized laser details ↗

Ask about this technique ↗

Selective fibre removal

Burnout / devoré

A controlled specialist treatment removes a compatible fibre component, leaving a patterned sheer structure in a suitable blend.

Suitable starting point
Specifically selected mixed-fibre fabrics.
Why choose it
Transparent areas with a different texture.
Design, limitations & sample checks

Limitations: It is not a scorched print; the remaining structure must support the garment.

Design it well: Specify both the visible pattern and required coverage.

Approve on the sample: Check transparency, strength, comfort and care on the final blend.

References: Dharma Trading — Fibre Etch and devoré technical reference ↗

Ask about this technique ↗

Compare your options.

A wash is not the same as a dye or print

Dyeing adds colour through a system chosen for the fibre. Pigment coloration attaches colour at the surface using a binder. Washing and finishing can change surface texture or colour; abrasion removes material mechanically. Printing places a graphic in chosen areas.

Names such as mineral, snow, vintage and acid wash do not specify one universal recipe. A reference photograph and an approved physical sample are more useful than the name alone.

  • Colour direction: describe the base shade and the lighter or darker areas.
  • Texture direction: distinguish a smooth faded face, fuzzy surface, marbling and actual holes.
  • Placement direction: mark collars, seams, sleeves, hems and any areas that must remain clear.

References: CottonWorks — Dyeing basics ↗CottonWorks — Garment finishing terminology and processes ↗

Choose the fabric before choosing the effect

Ask for the actual composition, GSM, knit or weave, current dye system and any coating. A cotton-rich fleece, a polyester performance jersey and an elastane blend cannot be treated as interchangeable.

Our planning recommendation is to keep aggressive distressing away from functional performance areas unless a tested sample supports it. For a sports kit that only needs a worn visual, a printed texture may provide the design direction without deliberately abrading the fabric.

  • Check the body, rib, hood lining, drawcord, sewing thread and trims together.
  • Agree whether a matching set should share a shade or intentionally contrast.
  • Record measurements before and after the intended finish.

References: Archroma — Fibre-specific dyeing systems ↗RUDOLF HUB1922 — Garment finishing product reference ↗

Approve the whole garment, not just a fabric square

A wash may change how an existing print, patch or thread looks. A decoration applied after washing can have different edge clarity and colour. Agree the intended order with the sample rather than assuming all effects can be stacked.

For an intentionally varied finish, approve both the target look and an acceptable variation range. A single hero photograph cannot define every permissible patch, fade or streak.

  • Review front, back and side views in consistent lighting.
  • Inspect a close-up of seams, rib and decoration edges.
  • Check finished dimensions, fabric strength, rubbing transfer and the proposed care route on the actual sample.
  • Keep the approved sample and its fabric/finish references together for repeat orders.

References: CottonWorks — Comparing denim finishing technologies ↗Officina39 — Garment dyeing and finishing systems ↗

Care instructions come from the finished garment

The fibre label alone does not determine care: dye, print, backing, patch, elastic and finish all matter. Ask for care guidance supported by the approved construction and decoration, and make sure the final label agrees.

No wash name proves that a product is low impact. If an environmental claim matters to your brand, request evidence for the actual material, chemistry and production route instead of copying a technology supplier’s general claim.

  • Do not promise a fixed number of washes from a photograph.
  • Confirm whether shade variation is intentional and explain it accurately to customers.
  • Ask us about a finish that is not listed; send the garment, reference effect and planned use.

References: CottonWorks — Comparing denim finishing technologies ↗

BEFORE YOU BRIEF YOUR COLLECTION

Your questions, answered.

What is the difference between acid wash, mineral wash and snow wash?

These names often describe different mottled or faded appearances, and usage varies. Send a reference showing pattern size, contrast and placement, then approve a physical sample rather than ordering by the name alone.

Is garment dye the same as pigment dye?

No. Garment dye describes when colour is applied: after the garment is sewn. Pigment describes a colour system held at the surface with a binder. The garment stage and the colour chemistry are separate choices.

Can a polyester sports jersey have a washed streetwear look?

A printed aged texture may be a useful route, but the result and hand must be sampled. A treatment developed for cotton cannot simply be assumed suitable for a polyester performance jersey.

Can printing and embroidery be combined with a wash?

Often a combined design can be developed, but agree the order and test the complete sample. Washing can affect decoration colour, relief, backing and appearance; decorating after washing may give a different result.

Will every washed garment look exactly the same?

Some finishes are intentionally variable. Agree a reference sample and acceptable light-dark coverage, placement and variation before production, particularly for matching sets.

Is burnout the same as a burn effect?

No. Burnout, also called devoré, selectively removes part of a suitable fibre blend to create sheer areas. A burn-look graphic is a visual design direction and need not remove fibres or create holes.

What care instructions should I print on the label?

Use instructions confirmed for the completed garment, including its fabric, dye, print, embroidery, trims and finish. This guide does not assign one wash temperature or care routine to every item in a technique family.

What should I send for a finish recommendation?

Send the garment type, composition if known, desired GSM or feel, reference photographs, colour direction and planned decoration. Add which areas should fade or remain clear. We can review the route and confirm sampling details in your quote.

YOUR IDEA DOESN’T NEED A TECHNICAL NAME

Tell us the look.
We’ll help plan the route.

Can’t find your fabric, print, embroidery or wash? Tell us what you are making and what you want it to feel like. Add reference pictures to your email.

[email protected] ↗

Mockups and sublimation file recreation are currently free. Sample, logo redraw and size-set costs are confirmed in your quote.

Prepare my email ↗

Opens a draft in your email app. Review, attach references and send it yourself. This page does not upload your details.

KEEP PLANNING

Connect the next decision.

01

Printing techniques

Compare sublimation, screen printing, DTG, DTF, vinyl, puff, high-density, silicone, reflective and specialist effects for sportswear and streetwear.

Read the guide →
03

Embroidery & patches

Compare flat, tonal, 3D puff and chenille embroidery, appliqué, tackle twill and patches. Plan artwork, backing and sample checks for your garment.

Read the guide →
04

Sportswear, from idea to kit

Choose sportswear fabrics, plan panels and artwork, and approve fit, printing and construction for team kits, training wear and fitted performance garments.

Read the guide →
05

Streetwear, from idea to collection

Plan streetwear fit, fabrics, GSM, washes, printing and embroidery, then turn the idea into a clear tech pack and an approved production sample.

Read the guide →

READ FURTHER

Technical references.

References explain processes and material principles. Supplier specifications are not a claim that Crownseam uses a particular brand, machine or certified system.